Prep
In the market for a 3D printer? Check out Prusa3D (affiliate) and their outstanding 3D printers designed and manufactured in the Czech Republic, EU.
Hardware
| Part | Type | Quantity | Shop |
|---|---|---|---|
| Screws | M3 x 4mm (L) countersunk head | 2 | tme.eu / mcmaster.com |
| Inserts | M3 x 3mm (L) x 4.5mm (OD) | 2 | tme.eu / mcmaster.com |
| Pins | M1.5 x 8mm (L) | 2 | tme.eu / mcmaster.com |
I recommend Torx or Hex countersunk head screws in either silver or black for aesthetic reasons.
Tools
For assembly, you will need the following tools:
- Screwdriver with either a Torx T10 or Hex H2 bit, depending on your choice of screw head.
I recommend the Xiaomi Electric Precision Screwdriver for its wide selection of bits and adjustable torque (suitable for delicate assemblies) - Amazon (affiliate)
Soldering iron for inserting threaded inserts. I use a Pinecil V2.
Hair dryer (or heat gun) for shaping the
Templearms.
In addition, the following tools are recommended but not mandatory:
- Heat set insert tips (for the soldering iron)
- Pliers (for removing
Hingedowel pins)
Prescription
The Hitomi frames are designed around a maximum prescription of ±2.50.
For stronger prescriptions high refractive index lenses are recommended.
Additional frame variants with increased thickness are provided when purchasing the 3D model.
3D Printing
All the parts are optimized for printing without the use of supports.
Parts can be printed with default settings but the recommendations below will ensure the best fit and finish.
Materials

| Material | Heat Resistance | Creep Resistance |
|---|---|---|
| ABS/ASA | Excellent | Excellent |
| PETG | Good | Good |
| PLA | Poor | Poor |
ASA filament is my top pick for its superior heat, creep and UV resistance.
Looking for 3D printing filament? I’m a huge fan of Prusament (affiliate). Outstanding quality control and broad range of colors and materials.
Creep is the gradual deformation of plastic material when subjected to constant load over time. This means that PLA prints of the Frame and Temples will deform slightly and feel looser over time.
Fiber infused filament (e.g. PETG-CF) is NOT recommended due to potential health hazards.
Settings
- 0.4 nozzle
- 0.15 or 0.2 layer height
- 3 perimeters
- 50% cubic infill
- Arachne perimeter generator
Temples, Hinges and Lens models each require mirrored copies.
Right click the models in your slicer and select Mirror -> Along X axis.
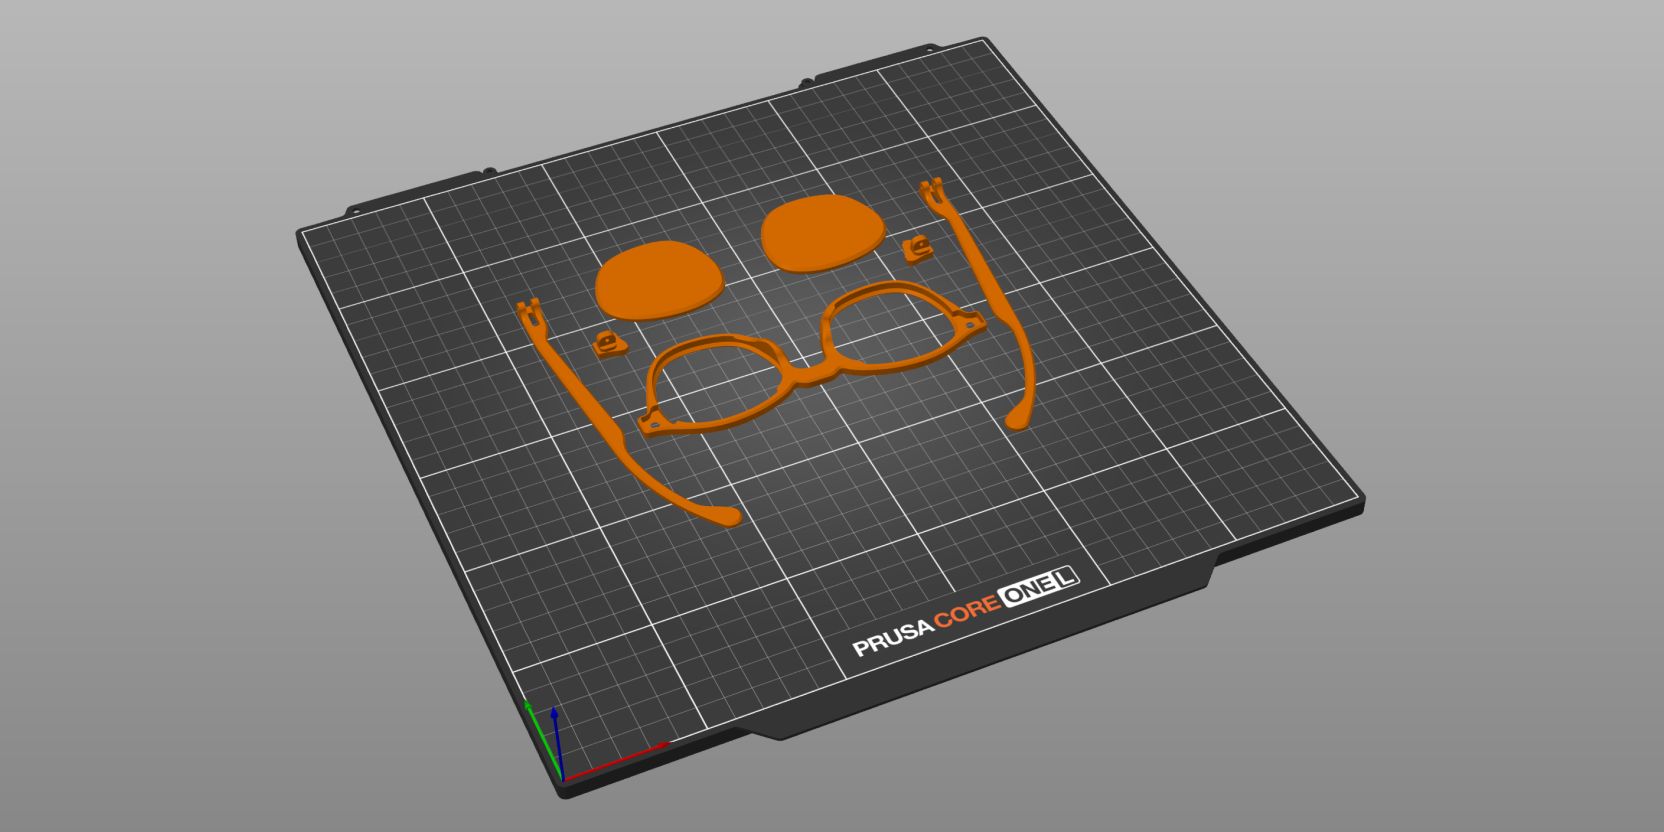
Frame_allParts.stl file for a pre-arranged print plate.The Frame_Bend_Jig and Temple_Bend_Jig should ideally be printed in ASA or ABS filament.
Seam placement
Seam placement can be optimized as follows:
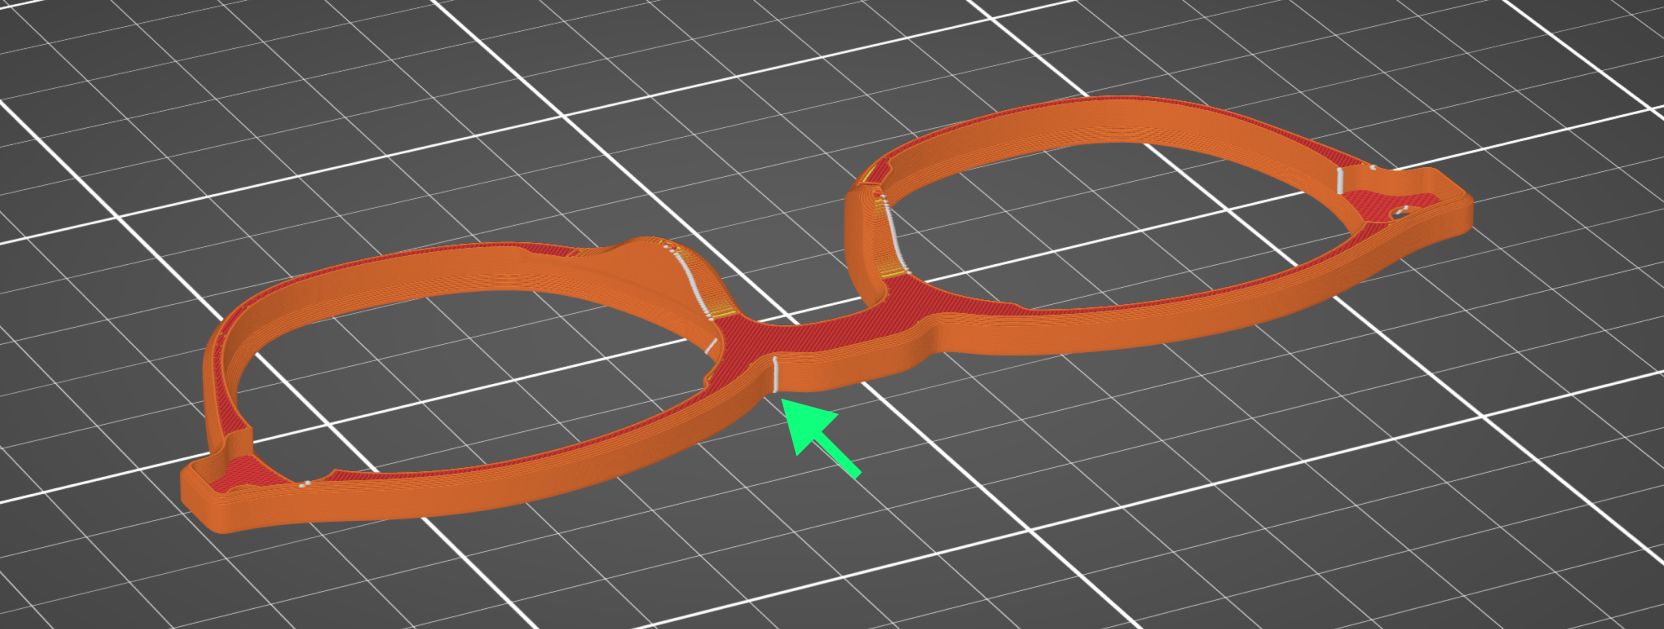
For the Frame select Aligned seam position or paint it manually using the Seam Painting feature.
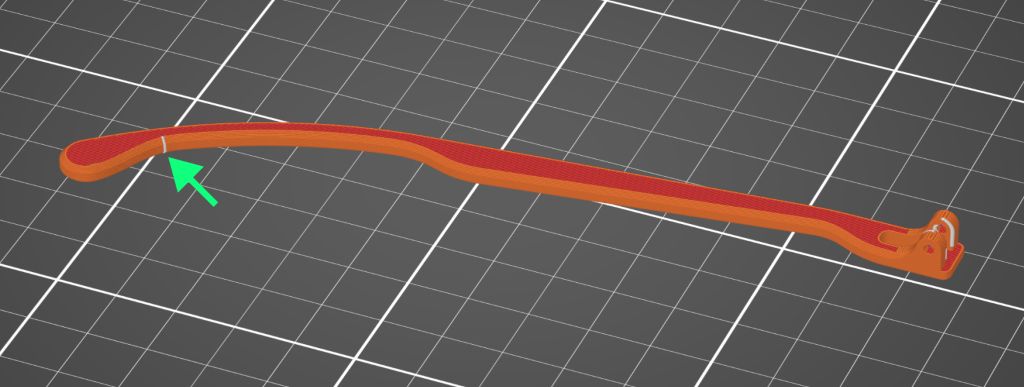
For the Temples use the Seam Painting feature and draw a vertical seam as shown.
Lens cutting
The 3D model bundle includes a 3D printing optimized Lens model.
The purpose of this model is similar to the demo-lenses usually included with retail frames.
Take the Frame and Lens 3D prints to an optician together with your prescription.
Optometrists may want to measure PD (pupillary distance) by marking the demo-lenses. Ask for an alternative measurement method if you don’t already have this measurement on your prescription.
Test fitment
Once the prescription lenses are processed, the optician will test fit them inside the Frame.
Opticians may want to test fit the eyeglasses with fully assembled pair of frames including the Hinge and Temple assembly, in this case, refer to the full assembly steps.
The Lens and Frame 3D models are designed with tolerances in mind that account for the prescription lenses having a tighter fit by default.
Fit adjustments
In the event that the finished prescription lenses do not fit the printed frames, you can re-print the Frame with a tweaked model scale.
Experiment with values ranging from 100.25% to 100.5%.
0.50% / 0.25%. Check if your slicer filament profiles compensate for shrinkage.Feel free to experiment with slight model scaling to achieve the right amount of lens tightness once you have your final prescription lenses.
If the prescription lenses still do not fit after scaling adjustments, you can experiment by printing one of the extra thickness variants of the Frame. Start with the Frame_4p8 variant (+0.4mm thickness).
Once your prescriptions lenses have been cut, do NOT modify the Frame model in any way that changes the nose bridge distance. This will throw off the pupillary distance of the fitted lenses.
Once you’ve covered everything on this page you can move on to the final assembly of the frames.